Mike’s FTL stuff > Ships guide > Stealth B
Stealth B
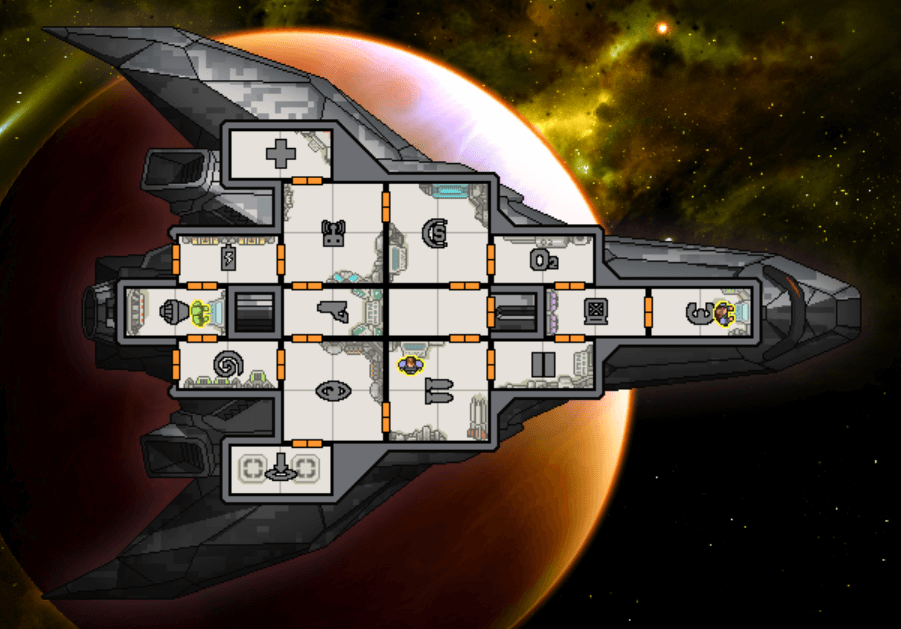
DA-SR 12

Avoiding and recovering from disasters
If your weapons get hit, don’t just rush all your crew to repair them. Keep the FTL charging, and also try to repair cloaking. The correct repair priorities are very difficult to judge, and depend on the situation. If you jump away with critical systems damaged, jump to a known safe beacon.
Plan your jumps carefully, to avoid being forced into asteroid fields. Suns and pulsars are also very bad. Try to avoid nebulas too, as they disable your sensors (see below) and often contain Auto-ships.
Plasma storms in sector 1 are actually safe, providing LRS do not show a ship detected. All the ship fights can be skipped. You have about a one in three chance to get scrap.
Look for flexible routes, so you can skip these hazards without losing beacons. Try to plan a route that lets you retreat to a previous beacon. This gives you a safe place to recover after a disaster. Also plan around doubled fleet pursuit.
Sector 1 distress beacons are worth visiting, but guaranteed fights are better. You have blue options from cloaking (okay, good once upgraded) and the Glaive Beam (weak). Note that Long-Ranged Scanners effectively decrease the value of unmarked beacons.
Despite the awful medbay, you can heal four crew at the same time.
When to skip fights
Some events let you “preview” a ship before you choose to fight it. Which fights should you take?
A hyper-cautious approach would avoid all fights with drones, at least before you get cloaking-3. This is safest in the short term, but you risk falling too far behind. You must evaluate each fight, but here are some guidelines:
Take fights against Rebel Riggers more willingly than against Auto-assaults. Auto-assaults always have offensive drones, but Riggers may have defensive ones instead. Beware Rebel Disruptors though, which can have both drones and hacking!
Don’t just consider the drones, but also the weapons. A Rebel Rigger with Heavy Laser and Mini Beam is incredibly dangerous. It would be a lot safer with just a Leto for weapons.
If a scary-looking pirate is offering you a bribe, probably just take it. Fighting only gives a 40% chance of getting an additional scrap reward, though there’s also a chance of 15 hull repair.
Consider the event reward. An Auto-assault guarding a storage cache is worth more than one guarding a sensor station, which is worth more than one that’s deactivated.
Basic combat
Put the Zoltan on engines. They can steal power from cloaking. After cloaking-3, consider running your pilot into doors during the jump; this may stop boarders getting into weapons.
Usually start the Glaive in shields, for maximum damage. Sometimes it’s better to start in weapons or drones, to neutralise their offence faster. Against a two-power weapon system, consider targeting only the weapons to get extra weapons training (but beware enemies running on low hull).
Against Zoltan Shields, use exact beam placement to damage weapons. Zoltan sector 2 is less dangerous than you might think, because the Zoltan ships are not pirates: the Zoltan crew will force power into slot 1, so you can disable a 3-power weapons system.
Later on, with fully-trained weapons crew, you do not need to delay firing the Glaive against enemies with cloaking: it can hit them exactly as they enter cloak. Practise your weapons or hacking timing against non-cloaking enemies. Similarly, a pre-ignited Glaive can fire immediately against cloaking enemies.
Upgrade strategy
Spend your first 50 scrap on cloaking-3. In some extremely specific cases you could buy hacking first (e.g. lots of free stuff including drone parts, forced into a store…).
With cloaking-3, you are quite safe until sector 3. In most fights, you can cloak immediately and kill them before they fire a shot.
Your next priorities are shields and some offensive improvement, ideally hacking. Shields alone are enough for sector 3, especially if you upgrade them. In sector 4, typically about half the enemies will have 3 shields; but it’s possible that every enemy will have 3 shields.
At intervals, consider buying a weapons buffer. Early on there are more important uses of scrap. However, if you pick up a two-power weapon, it may be worth buying the buffer while you wait.
Choosing between shields and hacking
You obviously want both, but most likely you won’t be able to buy them both at the same store.
I prefer hacking first if possible. Shields are much easier to find (as a forced system), and hacking is the most efficient offensive option. Efficiency may matter, because two-power weapons are very expensive to get online, and you want the offence in time for sector 4.
You cannot afford to be picky. If a store is offering shields but not hacking, you must buy the shields. Going into sector 3 with neither system is extremely dangerous.
Shields are safer for sector 3, because they protect you better against the most dangerous fights. Hacking is safer for sector 4, because it gives you a way to win fights.
The only reason not to buy and upgrade shields is that offence in sector 4 may be a problem. A 1-power weapon solves that problem. Therefore I would take shields plus (say) an Ion Blast, instead of buying hacking (unless I could afford both systems).
Also consider replacing the Glaive with another weapon that you can get online sooner. For example, something like Flak 1 + Hull Laser 1 requires no upgrades and can last a long time. You definitely need shields here.
Specific weapon tactics
Correctly timed, a Heavy Laser can take down two shield layers. The Glaive needs to damage shields just before the laser connects. This won’t work when the enemy has a shield buffer (shields-5).
The same applies for Ion Blast or Ion Stunner. These are even better, as you can fire them ahead of time for a second chance to hit. An Ion Blast can even drop unbuffered three-shield enemies down to one shield if both shots connect.
With full weapons training and a third weapon, an Ion Stunner can do the same. Fire it from the back, then bring it forwards for the second shot. A Reloader also works.
Dealing with drones
Protect your weapons by checking where combat drones are aiming before you cloak. Only cloak if they are about to hit weapons or cloaking. Otherwise, delay your cloak until enemy weapons fire. Even then, wait to see whether weapons are targeting anything important. Ideally you’ll let them hit irrelevant rooms, to reduce the chance of the drone sniping your Glaive when cloak ends.
All drones hit the exact centre of the target room, but beam drones do not “line up” at the exact angle they will fire, making them harder to predict. Beam drones can drag into an adjacent room. Beam 1 drones cannot drag across the “long side” of a room (their beam is shorter than 1 tile), but Beam 2 drones can. It’s worth knowing the odds of a bad drag:
- Beam drone 1:
- From sensors, 13% drag into cloaking
- From the empty room above weapons, 7% drag into weapons
- Beam drone 2:
- From doors, 53% drag into weapons
- From weapons, 33% drag into cloaking
- From cloaking, 27% drag into weapons
- From the empty room above weapons, 27% drag into weapons
- From sensors, 27% drag into cloaking
It’s also worth knowing how fast they attack, to help decide when to cloak. On average:
- Combat 1 attacks every 2.9 seconds
- Combat 2 attacks every 1.9 seconds
- Beam 1 attacks every 3.6 seconds
- Beam 2 attacks every 4.4 seconds
Hard-mode trickery
On Hard specifically, enemy targeting can be manipulated to reduce the chance that your weapons or cloaking get hit.
“Toggle” the Glaive power as enemy weapons fire. Run the weapons crew to sensors to watch weapons charge. De-power your Glaive when the charge bar is full, then repower when the charge bar resets. This drastically reduces the chance of weapons being targeted, from 19% to 6.5%.
It seems the targeting is determined when the weapon first “turns green”, which happens a frame or two before the charge bar resets. If you wait for the weapon animation, it will be too late.
Weapons lose charge 6 times faster than they gain it. Against offensive drones, try to minimise the duration of your toggle. You can add a few unpause-pause cycles after the charge bar is full. Frame-perfect pausing would allow almost twice as many pauses as the weapon’s charge time, but that’s asking for trouble. Adopt a comfortable margin for error.
Venting below 50% oxygen makes enemies less likely to target cloaking. It also reduces the chance of weapons being targeted to 14.8%, but that’s only relevant if you can’t toggle the weapons power. Venting also has some risks, for example if your O2 gets hacked.
For that reason, vent precisely. Before jumping, drop O2 to 75%. Then vent the 4 empty rooms in the top part of the ship, with O2 off. This gets you under 50% O2 in ~6 seconds, or ~3 seconds if you also vent the airlock below engines. You can then decide whether to vent at the start of a battle.
Wait to see where enemy hacks land before venting. Get your weapons crew near a door. Remove power from rooms before they get hacked, especially weapons (on the first hack).
When repairing partially-destroyed weapons, having a Zoltan help with repairs will make weapons a priority target! This might be good or bad, depending on how committed you are to fleeing. To avoid it, you can position them on the bottom-left square and dodge them out into cloaking briefly. Dodging out the room can also preserve crew health.
Now you’re just being silly
Consider walking your engines Zoltan around the ship for timing the sensors dash. You can use my Zoltan treadmill for accurate timing.
It’s even possible to time enemy weapons purely with crew movement and weapon animation (and this can potentially be used by any ship). You can use this when sensors don’t work, such as in a nebula, and you can let drones hit your sensors.
Use crew movement to time the weapon charge, de-power the Glaive, wait for the weapon to “go green”, then re-power.
When you don’t know the type of missile, de-power and wait a few frames to see if it turns green. Bombs are easy: they start animating before charge resets. Flak doesn’t have a “green” frame; just re-power on the first animation.
Early-game tactics for specific enemy weapons
All these tactics assume you’re playing on Hard and using the advanced tricks described above. With that as a baseline, we can make more specific analyses.
Mini Beam
Mini Beam into cloaking has a high chance to drag into weapons. Cloaking is less likely to be targeted when on cooldown, so you should typically cloak before the Mini Beam fires. This also gives the best chance of running away, as at least you get 10 seconds of cloak time.
By starting in weapons, your Glaive can interrupt an unmanned Mini Beam before it finishes firing; this prevents most drags into weapons. Toggling the Glaive correctly is more important, but it’s possible to do both with extremely good timing.
For example, optimal play against unmanned Heavy Laser + Mini Beam is cloaking the Heavy Laser without toggling, then toggling the Mini Beam perfectly. More forgiving play is doing a regular toggle for both.
Small Bomb (unmanned)
For an unmanned Small Bomb together with a faster weapon, only toggle for the faster weapon. Your Glaive will finish firing before the bomb explodes. You do need a very tight toggle (I’d use a full Zoltan treadmill).
A less exacting tactic is to just cloak the faster weapon without toggling.
Burst Laser 2 (unmanned)
With no interruptions, your Glaive will always fire most of its beam before an unmanned BL2 hits.
That’s enough to kill almost all ships in sectors 1 and 2, or at least destroy their weapons directly. Exceptions: cloaking, hacking, Zoltan Shields, and pirate Mantis Interceptor in sector 2.
Toggling the Glaive usually lets the BL2 hit about when you start firing. Therefore it can be better to pre-cloak and skip the toggle.
BL2 + Heavy Laser, for example. The Heavy Laser forces cloaking if it heads towards either weapons or cloaking. Toggling has little benefit here, since you protect weapons at the expense of cloaking; it only drops the chance that either system is hit from 5.9% to 5.1%.
So toggling makes the Heavy Laser fractionally less dangerous, while making the BL2 much more dangerous. It’s better not to toggle, and make the BL2 safe. The same logic applies to Ion Blast + BL2.
Basic Laser or Leto? Cloak the fast weapon without toggling. That gives a slightly lower chance of failure, even ignoring complications like piloting hits or double hits to cloaking.
Ion Stunner? Toggle, and cloak both weapons together. The chance of failure is marginally lower, and you also save hull.
Small Bomb? Pre-cloak without toggling, and you finish firing before either weapon can hit.
Mini Beam? Pre-cloaking with a near-perfect toggle (Zoltan on sensors) is slightly better, based on 50 tests each. Otherwise, just toggle and cloak the BL2.